How to file ITR online: Complete step-by-step guide

Say goodbye to tax stress! With our comprehensive guide, learn how to file your Income Tax Return (ITR) online easily and confidently

Published: Jul 4, 2024 05:45:31 PM IST
Updated: Jul 4, 2024 05:45:48 PM IST

When managing your finances, filing an Income Tax Return (ITR) is a crucial step. This document allows you to accurately report your income, expenses, tax deductions, investments, and taxes to the government. The Income-tax Act of 1961 requires taxpayers to file an ITR under specific circumstances. However, there are additional reasons to file an ITR, even if you don't have the requisite income. For instance, you may want to:

  • Carry forward losses to offset future gains
  • Claim an income tax refund
  • Secure a visa or loan from banking institutions
  • Purchase term insurance

Filing an Income Tax Return (ITR) is a crucial responsibility for individuals and businesses. It is a legal requirement under a country’s tax laws to ensure compliance and maintain financial transparency with the government.

In today's digital age, e-filing ITR has become the go-to method for filing Income Tax Returns (ITRs). This process allows you to learn how to file ITR online. 

Documents Required To File ITR Online

Before e-filing your tax return, ensure all required documents and information are ready. The Income Tax Department has made it easy to file your taxes, but preparation is vital for filing ITR online.

Here's a checklist of what you'll need:
Read More
  1. PAN and Aadhaar cards
  2. Bank statements and transactions
  3. Form 16 from your employer
  4. Donation receipts
  5. Stock trading statements from your broker platform
  6. Insurance policy receipts for life and health
  7. Bank account information linked to your PA
  8. Your Aadhaar-registered mobile number for e-verification
  9. Interest certificates from your banks


Steps to File ITR Online

Here is the step-by-step process of filling out ITR in India online via the official website:

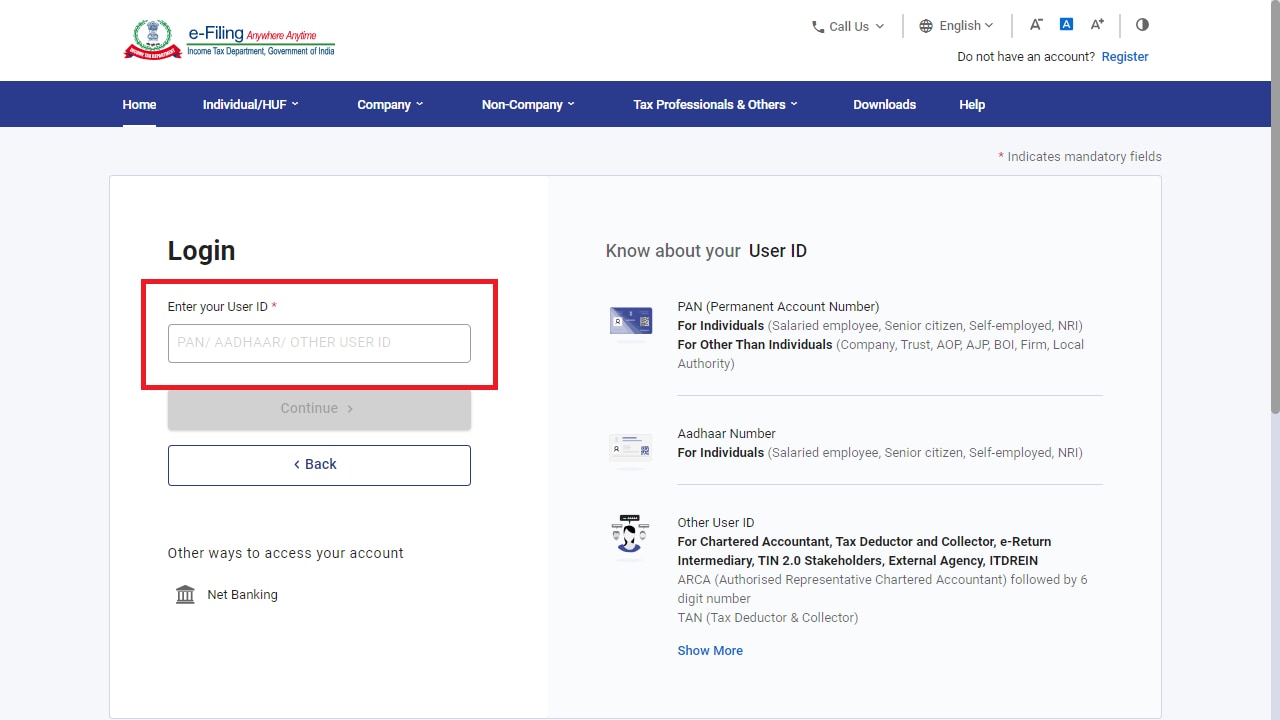
Step 1: Login

Head to the official Income Tax e-filing website and click the "Login" button.

Enter your Permanent Account Number (PAN) in the User ID section.

Check the security message in the tickbox to ensure you know the terms.

Type in your password to secure your account.

Click on the "Continue" button to proceed.

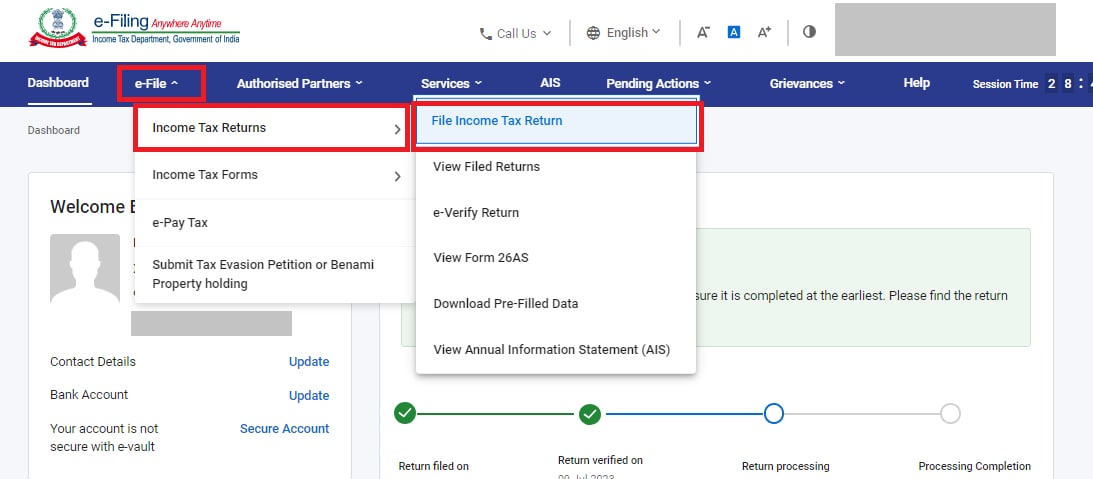
Step 2: Head To ‘File Income Tax Return’

Click on the "e-File" tab at the top of the page.

Choose the "Income Tax Returns" option from the dropdown menu.

Click the "File Income Tax Return" button to begin the e-filing ITR process.

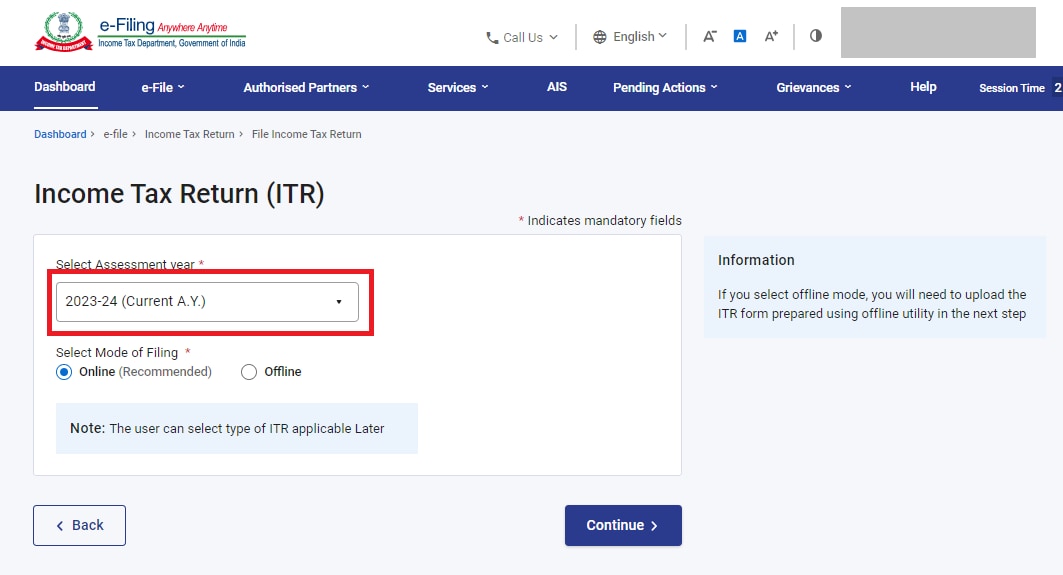
Step 3: Select The Right ‘Assessment Year’

Choose the correct Assessment Year for filing ITR:

       -If you're filing for FY 2023-24, select 'AY 2024-25'.

       -If you're filing for FY 2022-23, select 'AY 2023-24'.

Select the mode of filing ITR as 'Online'.

Choose the correct filing ITR type:

      -Original Return: The first income tax return is typically filed within the specified deadline.

      -Revised Return: Filed to correct the errors or inaccuracies on your original tax return (Section 139(5)), typically filled within three months before the end of the assessment year.

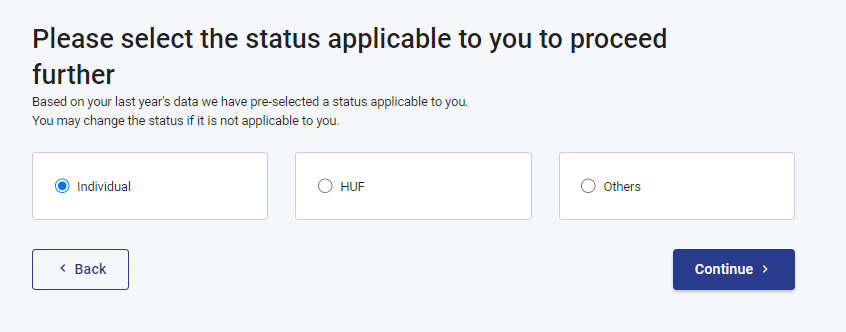
Step 4: Select The Status

Choose your applicable filing ITR status and continue:

  1. Individual
  2. HUF (Hindu Undivided Family)
  3. Others

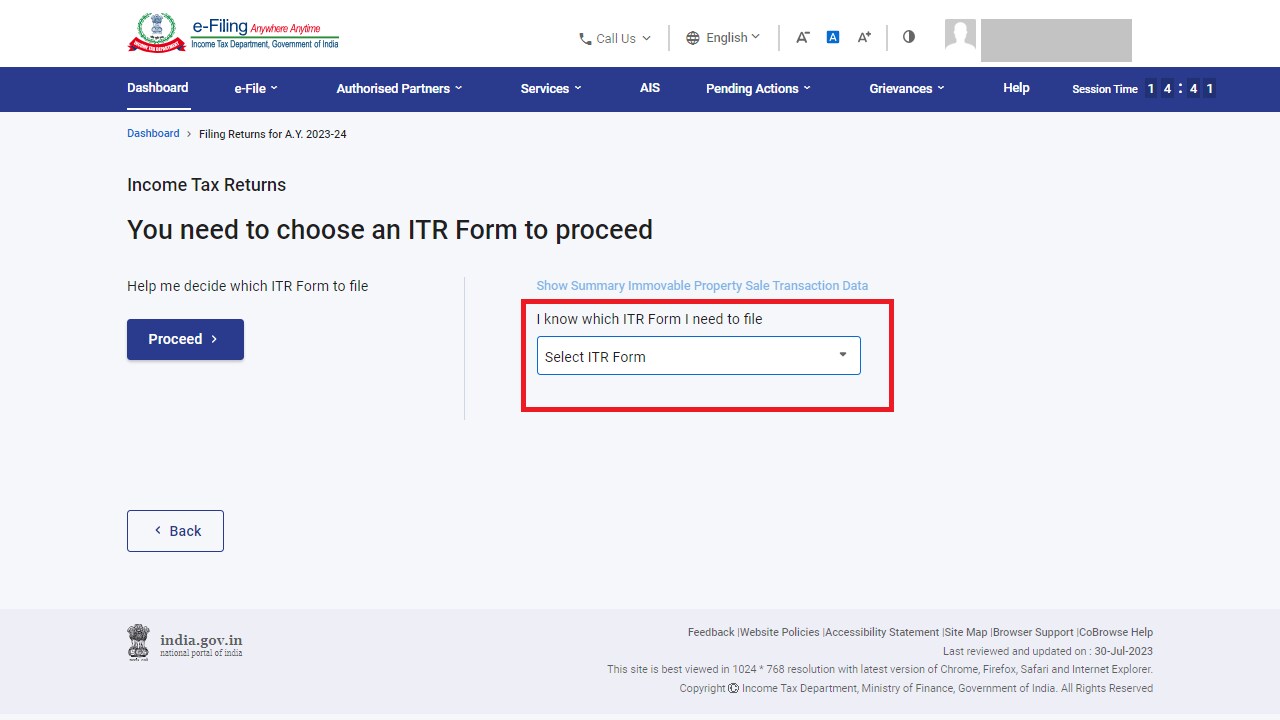
Step 5: Select ITR Type

Now that you've selected your filing status, it's time to choose the appropriate ITR (Income Tax Return) form. Selecting the correct ITR form based on your specific income sources and financial situation when filling out your ITR is crucial.

Take a moment to carefully review your income sources and financial situation to determine which ITR form is the most suitable for your needs. This will ensure a smooth “how to file ITR” process.

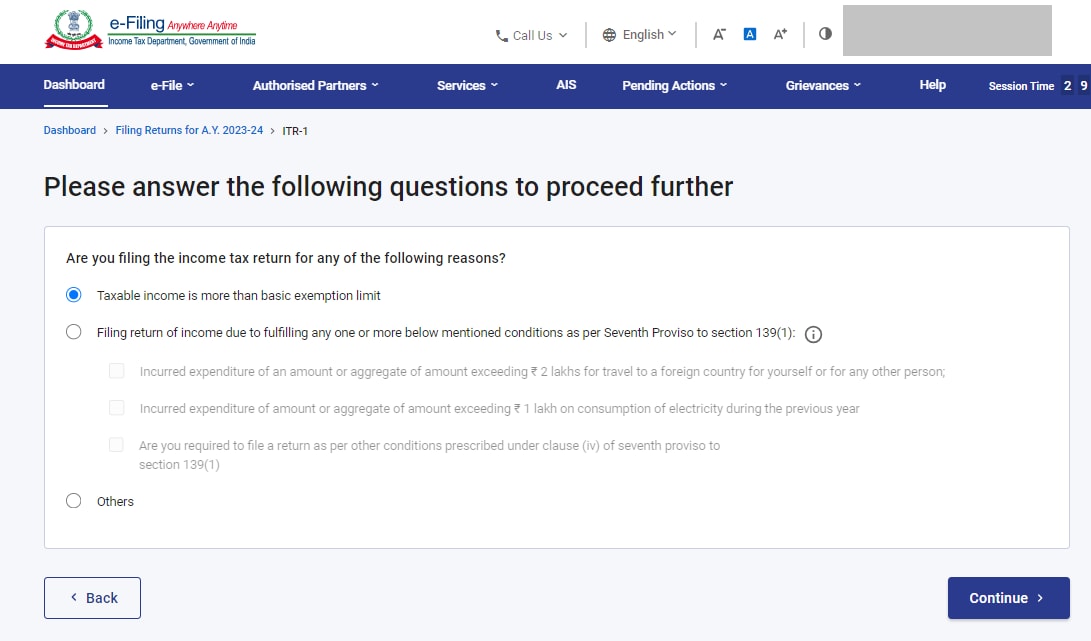
Step 6: Select The Reason For Filing ITR

Now that you've chosen your ITR form, it's time to specify the reason for filing your returns. Follow the steps below to ensure you select the correct option:

  1. Select the pertinent option that applies to your circumstance:
  2. Taxable income is more than the basic exemption limit: Select this option if your income exceeds the basic exemption limit.
  3. Meets specific criteria to file ITR: If you meet specific criteria, such as having income from a business or profession, select this option.
  4. Others

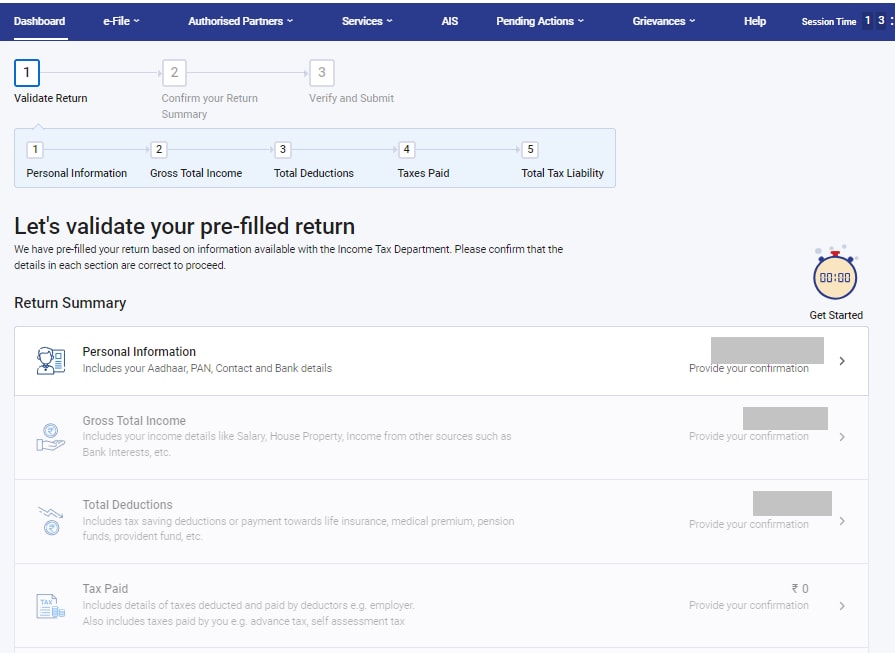
Step 7: Validate Pre-filled Information

Now it's time to review and confirm your details. Follow the below-mentioned steps to ensure accuracy and completeness:

  1. Review Pre-Filled Details: Your details, such as PAN, Aadhaar, name, date of birth, contact information, and bank details, will be pre-filled. Carefully review and validate these details to ensure they are accurate.
  2. Provide Bank Account Information: You must provide your bank account information to complete the filing process. If you haven’t already done so, add the necessary details to ensure a smooth and efficient completion.
  3. Review and Confirm Your Information: As you proceed further, ensure you disclose all relevant income, deduction, and exemption details. The website will pre-fill most of your information based on data fetched from your bank, employer, etc. Review the presented information carefully to ensure it is accurate.
  4. Confirm Your Return Summary: Once you've reviewed your details, confirm the summary of your returns. The system will ensure that your tax return is accurately processed.
  5. Make Any Necessary Payments: If you have any outstanding balance taxes, make the payment to complete the ITR filing process.

Step 8: E-Verify ITR

The final and crucial step in the e-filing ITR process is to verify your tax return within 30 days. Failing to verify your ITR is equivalent to not filing it, so completing this step is essential.

You have several options to e-verify your return:

  1. Aadhaar OTP: Use the one-time password (OTP) sent to your Aadhaar-registered mobile number.
  2. Electronic Verification Code (EVC): Generate an EVC through your net banking account or other approved methods.
  3. Net Banking: Verify your return directly through your net banking platform.
  4. Physical Copy of ITR-V: Print and send a physical copy of the ITR-V (Income Tax Return Verification) form to the CPC (Centralized Processing Center) in Bengaluru.

X